
The Survey feature within Apparity is primarily used for Affirmation, which is a way to ensure that your file management practices adhere to your company's EUC policies and governance. Business Administrators are able to create customized surveys, then disseminate the questionnaires to end users. Although this feature is primarily designed for Affirmation, its robustness and dynamic customization prove that it can be used for other processes.
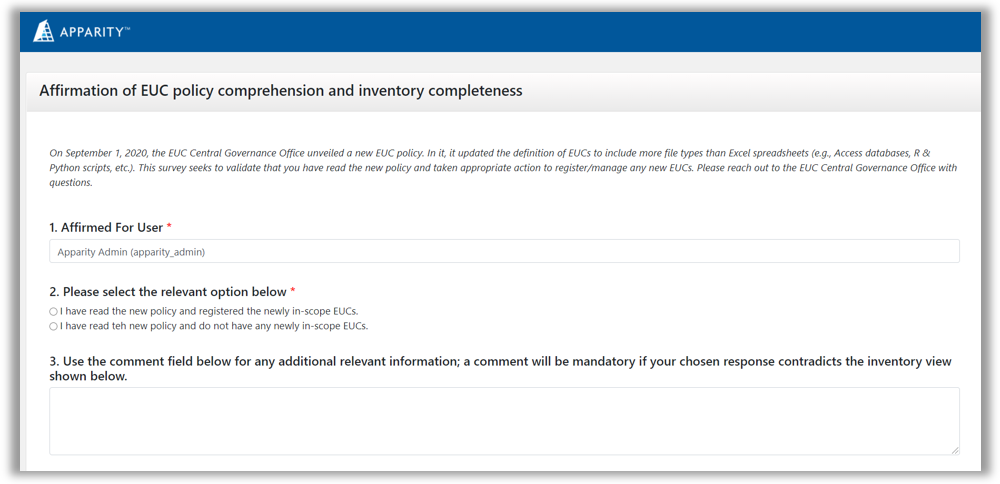
Example of an Apparity Survey
How to Access Surveys
1. Go to the Apparity Inventory Management System (AIMS).
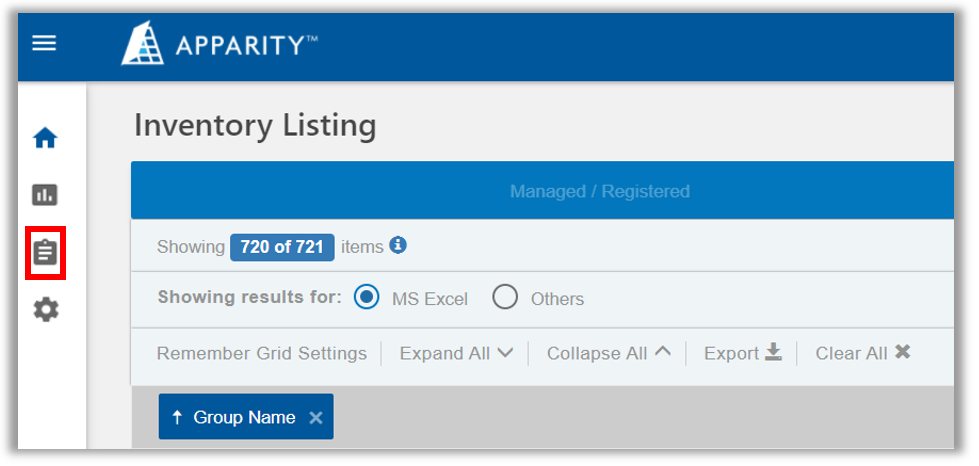
2. If you have the proper user permissions set (Business Administrator), you will see the Survey (clipboard) icon on the left hand panel. Click on the icon pictured below.
Survey Icon
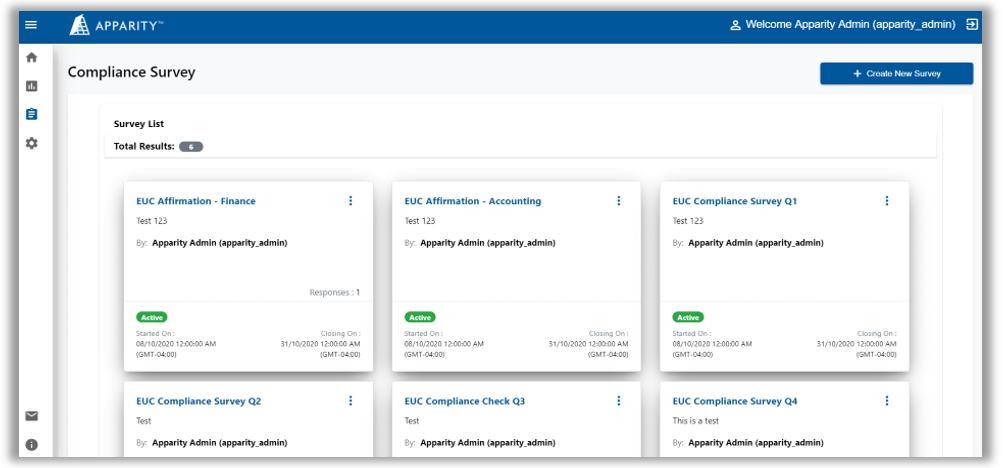
3. The Affirmation dashboard will load, and you will be able to see all created, completed, and on-going surveys.
Affirmation Dashboard
How to Create a Survey
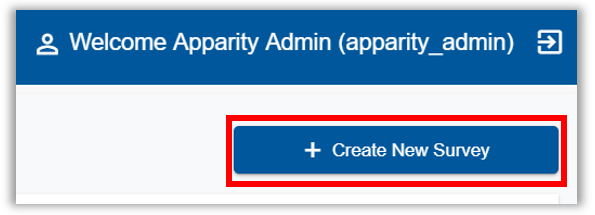
1. Click on the Create New Survey button in the top right hand corner of the Affirmation dashboard.
2. The Create New Survey page will load. It is divided into two sections: Survey Details and Upload Questionnaire File.
3. In the Survey Details section, you will name the survey, enter a description, and set the dates and times for a response timebox.
4. In the Upload Questionnaire File section, click on Browse to select the zip file to upload.
Note: The zip file will need to be created with the help of the Apparity Team. Please contact your Apparity lead for further details.
5. After the zip file is uploaded, a confirmation box will appear. Within the box, there will be the link that you can copy and send via email. To copy the link, simply click on the white Copy to Clipboard button that is to the right of the highlighted link.
Survey Confirmation
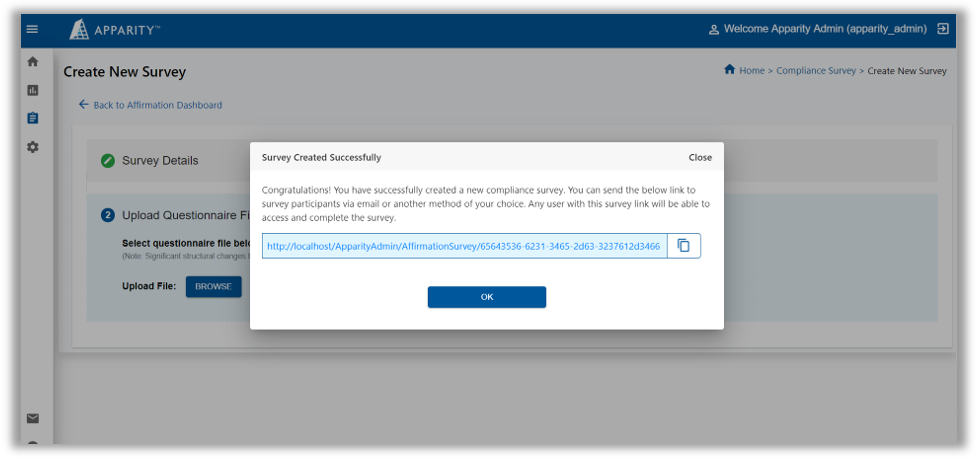
6. To exit the survey, click on Ok.
How to Modify or Delete a Survey
1. If you are not already on the Affirmation dashboard, please go to AIMS and click on the Survey clipboard icon found on the left hand menu (as indicated in the How to Access Surveys section).
2. After identifying the survey that you would like to edit or delete, click on the three dots in the upper right hand corner of the tile.
3. If you would like to modify the survey, click on Edit Survey. Then you will be able to edit the survey details and click on Apply to save the changes. You can also reupload the questionnaire file by clicking on the Upload File Questionnaire section, then click on Browse to select a zip file. Click on Ok to return to the Affirmation dashboard.
4. To delete a survey, simply click on Delete Survey. A confirmation box will appear. Click on the red Delete button to remove the survey.
How to Send a Survey
1. After creating a survey, Apparity will provide a link.
2. To copy the link, click on the white Copy to Clipboard button to the right of the link in the confirmation box. Then you will be able to paste the link in an email and disseminate it accordingly.
3. Another way to copy the survey link is to click on the three dots in the upper right hand corner of the survey, then click on the option to Copy Link to Clipboard.
4. A green confirmation bar will appear on the top of the screen, indicating that you can now paste the survey link in an email.
How to View Survey Responses
1. To view survey responses, go to the Affirmation dashboard by clicking on the Survey clipboard icon in the module menu.
2. Locate the survey in the listing. The number of responses will be indicated in the tile. To view a detailed breakdown, click on the three dots in the upper right hand corner, then click on See Responses.
3. The Response page will load. It displays a table with the details of each response, as well as the time period of the survey, the response count, and the activity state.
Survey Response Page
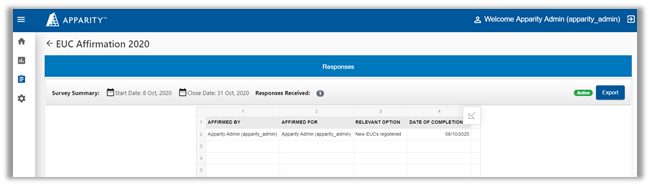
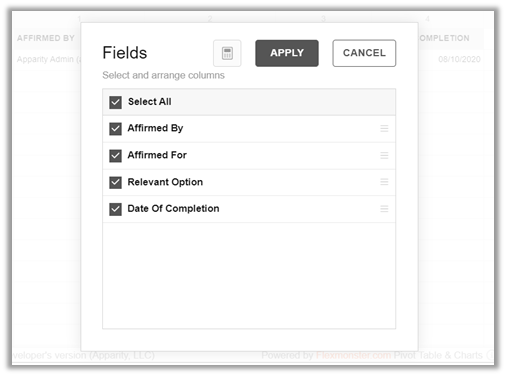
4. To modify the table display, click on the arrow in the upper right corner of the table. Here, you will be able to select or deselect certain field parameters. You can also click on the calculator icon to create customized quantitative field metrics. After adjusting and/or creating new fields, click on Apply to refresh the the table.
Fields for Response Table
5. To export the response table, click on the blue Export button on the Response page. A workbook version of the table will download.